

ℹ️
Info: This article describes the common layout
of all overview screens. An explanation of the fields for each component
can be found in the separate articles:
Set up criterion groups,
Set up approval groups,
Set up reader groups and readers
and
Build an advanced route.
Available buttons
The following buttons appear at the top of each overview screen:
- Export to Excel - exports the current table view to Excel.
- Audit - exports an Excel overview of all changes made within this component. For each change, the file contains the version, date, user and reason given for the change.
- Template - downloads an Excel template for importing items.
- Upload - imports items using a completed Excel file.
- Actions - bulk actions for selected items: Activate selected elements or Deactivate selected elements. First select one or more items using the checkboxes on the left.
- + Add (on the right) - adds a new item to the component being viewed, such as a criterion group or an advanced route.
Column options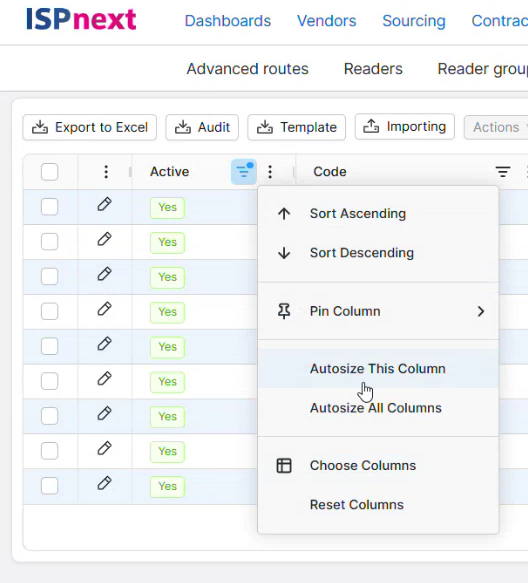
The tables use an advanced table component that allows you to customise the view according to your preferences. Click the three dots next to a column heading for the following options:
- Sort ascending / descending - sort the table by this column.
- Pin column - pin the column to the left or right, so that it remains visible when scrolling horizontally.
- Automatically adjust column width / Automatically adjust all columns - automatically adjust the column width to fit the content.
- Choose columns - choose which columns are visible in the table.
- Reset columns - reset the column layout to the default view.
At the bottom of each overview, the page size can be set using Page size, and you can navigate between pages.
More information
This article is part of the Advanced Routes 2.0 guide.