

This article describes the contents of the Vendors > Vendors > Details > Info page.
Address
All name and address details of the supplier are shown here. These can be edited by clicking on the 'Edit' button.
Archive a vendor
- Navigate to Vendors > Vendors > Active, and select the desired supplier.
- Navigate to the 'Info' tab, and click next to the heading 'Address' on the 'Edit' button.
- A pop-up window will open. Click in the top left of the window on 'Archive vendor'.
- The vendor is now in the 'Archive' tab under the vendor overview. The vendor's data is not deleted, but the vendor will no longer appear in presented data in VendorLink.
Delete a vendor
- First follow the steps under 'Archive a vendor'. A vendor must first be archived.
- Navigate to Vendors > Vendors > Archive and select the desired vendor.
- Navigate to the Info tab, and click under 'Address' on the 'Edit' button.
- Click in the top right of the pop-up window on 'Delete vendor'.
- Click 'Yes' to confirm the deletion.
Contacts
Under the heading 'Contacts' all contacts registered with the vendor are displayed.
Add a contact
Read here how to add a contact person.
Edit a contact
- Click on 'Edit'.
- Under the heading 'Contacts' select the desired contact person.
- Make all desired changes.
- Click on 'Add'.
Delete a contact
- Click on 'Edit'.
- Under the heading 'Contacts' select the desired contact person.
- Click at the bottom of the form on 'Delete'.
- Confirm the deletion by clicking 'Yes'.
Give a contact access to the Supplier Portal
Read here how to give a contact person access to the Supplier Portal.
Contact person properties
The table below explains all properties that a contact person can have. This way you know exactly what to fill in for each field. Fields in VendorLink surrounded by a blue border are mandatory.
| Term | Explanation |
| Order | Enter a number here. This number determines the order of the contact person in the contact list relative to other contacts for this vendor. |
| Initials | The initials of the contact person. |
| Title | The title of the contact person. Read here more about setting available titles for your contacts. |
| Contact type | The contact type for this contact person. You set contact types yourself, read more about this here. These are essential when using Mail Campaign and must be set for all your contacts. |
| First name | The first name of the contact person. |
| Insertion | The insertion (e.g. "van", "de") of the contact person. |
| Last name | The last name of the contact person. |
| First name + Last name | This is the display name of the contact person. This is how the contact person will be greeted in the Supplier Portal, and also how you recognise the contact within VendorLink. |
| The email address of the contact person. This is used for communication and as username when the contact person has access to the Supplier Portal. | |
| Mobile | The mobile phone number of the contact person. |
| Phone number | A general phone number of the contact person. |
| Function | The function of the contact person. |
| Department | The department where the contact person works. |
| Language | The language the contact person uses as their primary language. When the contact person uses the Supplier Portal, this language will also be set as the default language there. |
| Remarks | Remarks about this contact person. |
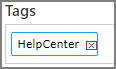
Tags
Under tags it is possible to link characteristics to a vendor. These tags are used in searches. Example: all vendors with the tag 'Utrecht' will be shown if you search for 'Utrecht' in the vendor overview.
Add a tag
- Click under the heading 'Tags' on the input line for tags.
- Type the desired word.
- Press the Enter key.
- Repeat steps 2 and 3 until you have added all desired words.
Remove a tag
- Find the tag you want to remove.
- Click on the cross to the right of the tag word.
Google Alerts
By means of Google Alerts it is possible to display the latest news about a vendor. Read here more about setting up these alerts.
Audit Info
In the overview under 'Audit Info' you see information about the audits of this vendor. You see which checklist items are still open, and until when the current audit is valid. You can also see which document will expire next.
Contracts
In this overview you see a summary of all contracts concluded with this vendor. You see the contract number, contract name, and the contract end date.
Categories
In this overview you see all categories linked to the vendor.
Link a category
- Click on 'Edit'. In the left column you see all categories not linked to this vendor, and in the right column you see all categories currently linked to the vendor.
- Select in the left column the category(ies) you want to link.
- Click on 'Add'.
Unlink a category
- Click on 'Edit'.
- Select in the right column the category(ies) you want to unlink.
- Click on 'Remove'.
Administrators
In this overview you see all administrators of this vendor. The set administrator is used for notifications.
Add an administrator
- Click on 'Edit'. In the left column you see all administrators not linked to this vendor, and in the right column you see all administrators currently linked to the vendor.
- Select in the left column the person you want to set as administrator.
- Click on 'Add'.
Remove an administrator
- Click on 'Edit'.
- Select in the right column the person you want to remove as administrator.
- Click on 'Remove'.
Highlights
In this overview you see all 'Highlights' related to the vendor. The overview shows, among other things, Google Alerts, tasks, and notes registered under the vendor's name.